WooCommerce Quick Start
This section is for Cashflows customers who are using our Gateway. It explains how to add Cashflows to a checkout by installing our plug-in for WooCommerce. There is also guidance on how to configure settings, such as whether to store card details and so on.
If you need further support with this guide, please email implementations@cashflows.com with these details:
MID
Merchant Name
Current Step (i.e. Step 2.5 for Integration Mode)
Any Additional Details
Getting Started
Although not required, we recommend you install the plug-in and test in a non-production environment before using it for live transactions.
To support your testing, we have a dedicated integration environment: https://secure-int.cashflows.com/gateway/.
API credentials
To integrate with Cashflows you’ll first need to collect your API credentials:
Configuration ID - unique identifier for your account included in API messages
Current API key - the key for encrypting API messages sent to us
To retrieve your credentials:
Sign into Cashflows Portal and select Configuration from the menu.
Select the API Data tab, the API Data page displays your API configuration details:

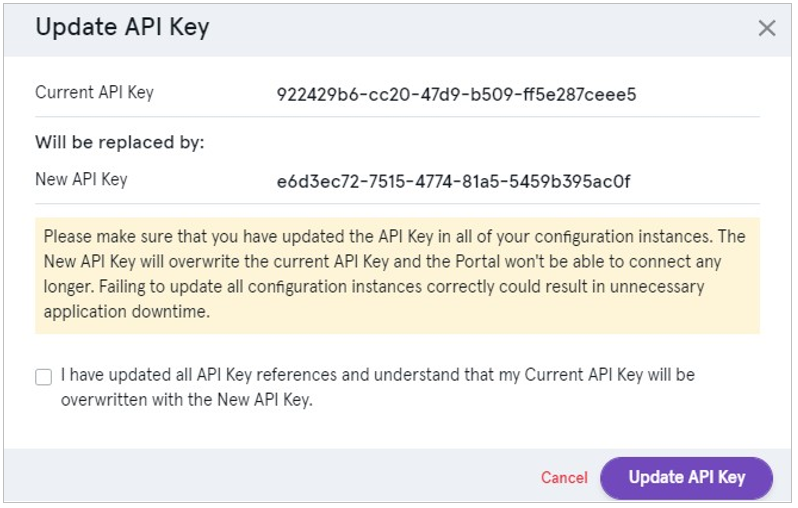
If you need to generate a new API key this can be done from the API Data tab:
Select Generate a new API key to generate a new key.
Wherever your integration uses the API key, replace the old key with the new one.
When you have successfully updated all API key references, check the confirmation box and select Update API Key:
Install our plug-in for WooCommerce
To install the WooCommerce plug-in, you need the plug-in file you can download from the Wordpress website. Save this file in a location where you will be able to find it during the installation process.
The following steps require that you have signed into your WooCommerce account and are in the Site Admin section. To install the plug-in:
From the WooCommerce Menu bar on the left-hand side, select Plugins.
Select Add New from the sub-menu or at top of the page.
Select Upload Plugin.
Select Choose File and select the plug-in file that you downloaded.
Select Install Now to install the plug-in onto your WooCommerce website.
Configure the plug-in settings
To configure the settings in WooCommerce, you need your API credentials.
The following steps require that you have signed into your WooCommerce account and are in the Site Admin section. To install the plug-in:
Select Settings.
Select the Payments tab:
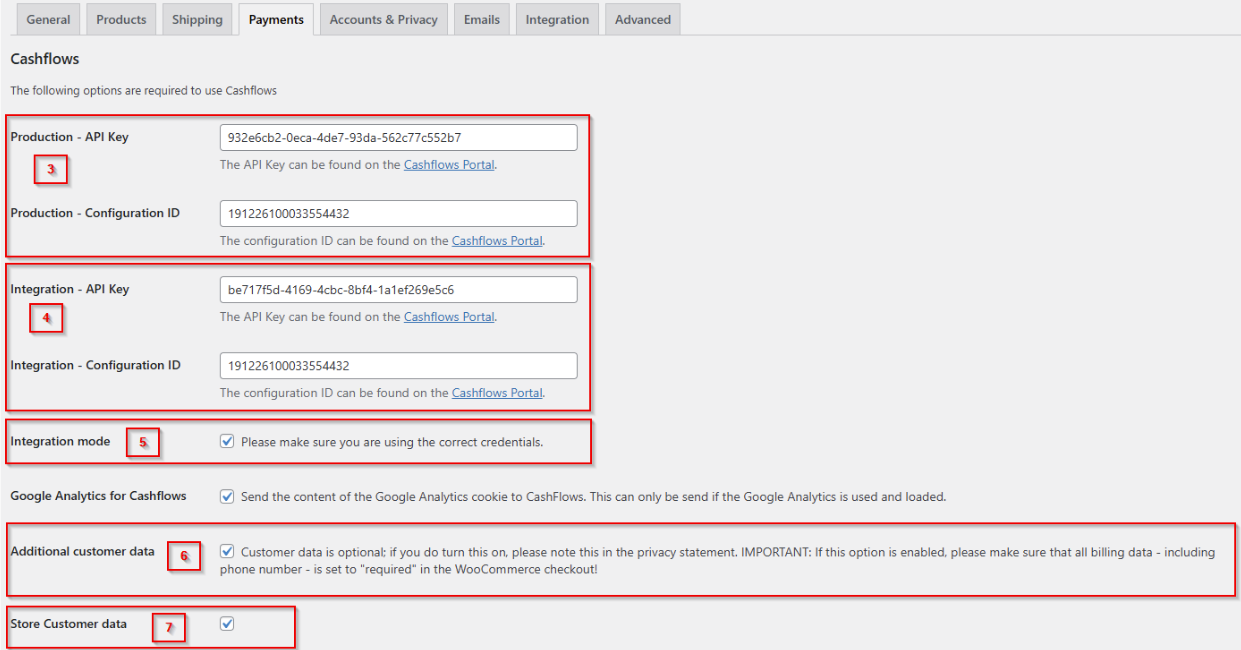
- Enter your
Production API KeyandProduction Configuration ID, see API credentials. - If you are not using a production environment, enable Integration mode and enter the
Integration API KeyandIntegration Configuration ID, otherwise, you can leave these boxes blank. Warning
You must disable Integration mode when moving to production, otherwise you will be unable to transact.
- If you are not using a production environment, enable Integration mode and enter the
- Additional Customer data - sends customer data (for example, address and items purchased) to Cashflows, these details can be viewed in Cashflows Portal.
Important
If enabled, your terms and conditions must alert the customer that you’re storing these details. This is a GDPR requirement that, as the merchant, are your responsibility.
Store Customer data - enables Cashflows to securely store card details within your merchant account. This enables customers to securely save a token of their card to enable customers to select from their saved card(s) in future payments.
For security, the security code (CVV) is never stored and must always be provided by the customer. See the next section for further details.
- Enter your
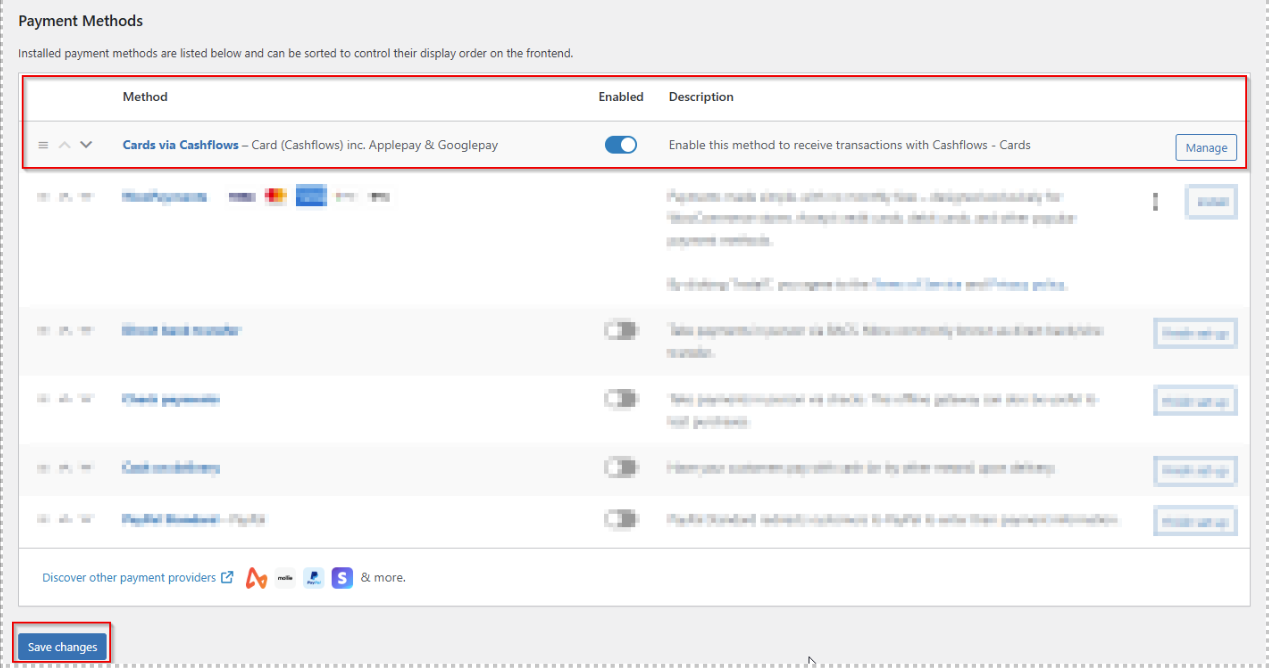
Enable Cards via Cashflows at the bottom of the page and click Save changes.
Select Manage next to the Cards via Cashflows option.
In the Customer Message section, you can specify your own text for the payment option presented to your customers on your checkout page:
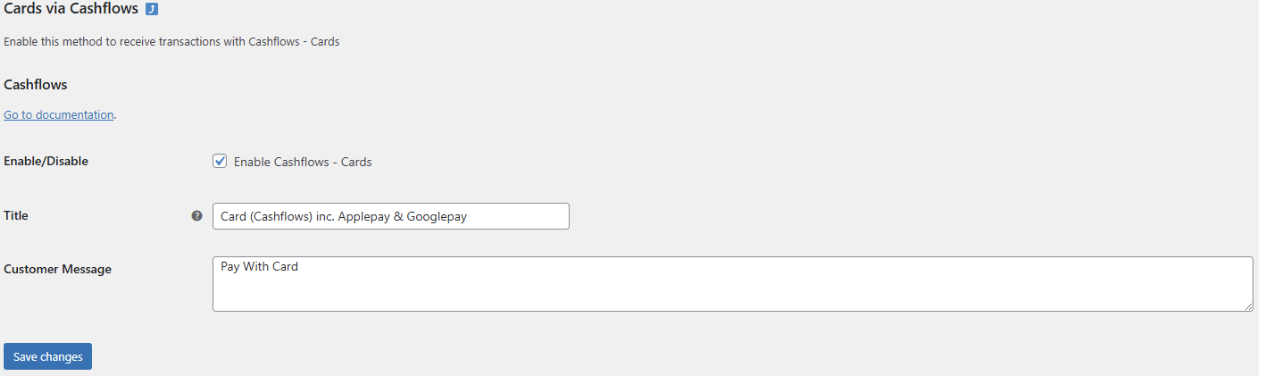
Click Save changes.
Storing Shopper Details with WooCommerce
If enabled, your customers can choose to have their Card Details tokenised and stored with Cashflows to speed up future checkouts.
To enable Storing Customer Details:
Login to Cashflows Portal (Test) or Cashflows Portal(Live) , open your MID, then navigate to Configuration.
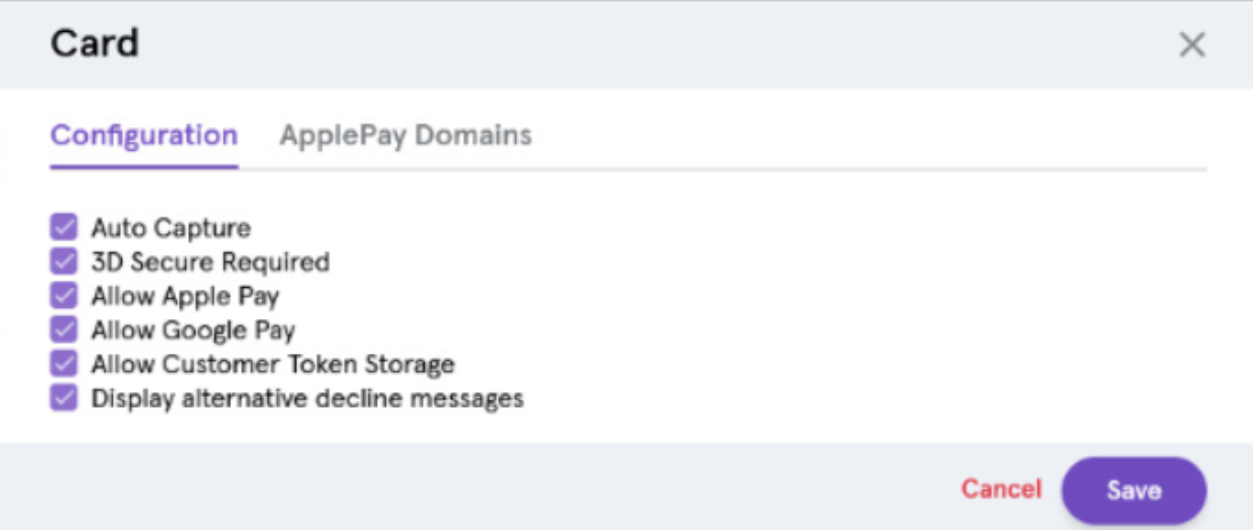
Select Payment Methods, then select Card.
Enable Allow Customer Token Storage in the configuration section:
Receiving Responses from the Cashflows Service
Our API will automatically connect with the WooCommerce Plugin provided you have entered the correct details. However, if you have any IP or Country Blocking this can stop the notifications going through leading to transactions not being updated correctly.
Please ensure that Ireland is a Whitelisted Country and these IPs are whitelisted:
Production:
54.74.58.255 and52.215.48.101Integration:
54.75.5.171and54.73.83.234
Creating Hosted Checkout Pages
Please review our in-depth guide on creating and customising your Hosted Checkout Pages.